Building an 'XPS' power supply for a Naim CDS3
As a digital sceptic it's taken me a while to embrace CD as a viable source for listening to music. I didn't buy my first CD until 2000 and my first CD player
(a Cambridge Audio 640C) until 2004. The 640C was actually amazingly good for the money but I still didn't find myself listening to it a great deal
other than for background music. In the latter role, I did find CD has a very useful function - saving stylus wear!
Anyway the 640C went wrong after a few years (I guess you get what you pay for!) so I thought I'd better start thinking about a replacement. About this time Naim revised their CDX2 player, which now sported a digital output. This meant quite a few secondhand 'mk1' CDX2s started to come onto the market at prices that seemed a sensible amount to spend on a CD player.
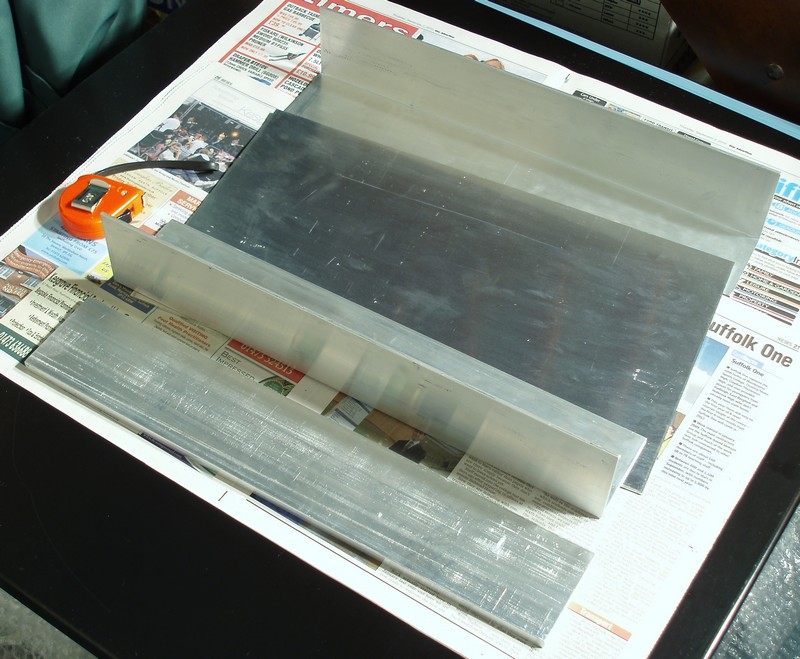
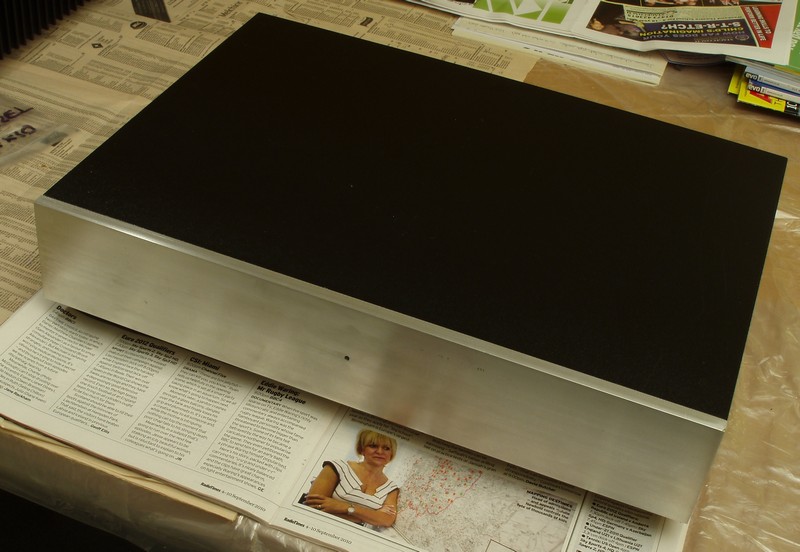
The basic chassis components cut to size - the aluminium angle needed trimming down to fit into the Naim sleeve.
Anyway the 640C went wrong after a few years (I guess you get what you pay for!) so I thought I'd better start thinking about a replacement. About this time Naim revised their CDX2 player, which now sported a digital output. This meant quite a few secondhand 'mk1' CDX2s started to come onto the market at prices that seemed a sensible amount to spend on a CD player.
Of course things got slightly out of hand when I realised second hand CDS3s weren't too much more than the more expensive (i.e. newer) CDX2s...
The slight flaw here, of course, is that the CDS3 has no internal power supply and is normally powered by the Naim XPS, XPS2 or 555PS. So, all I had to do now was build one...
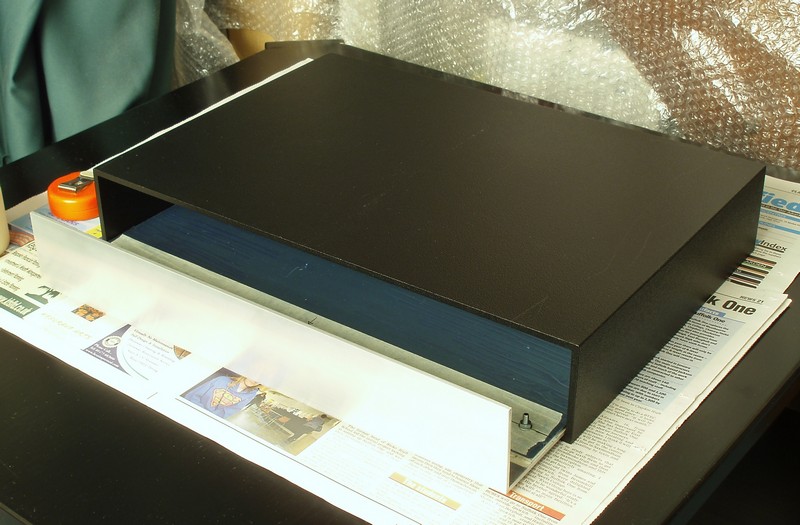
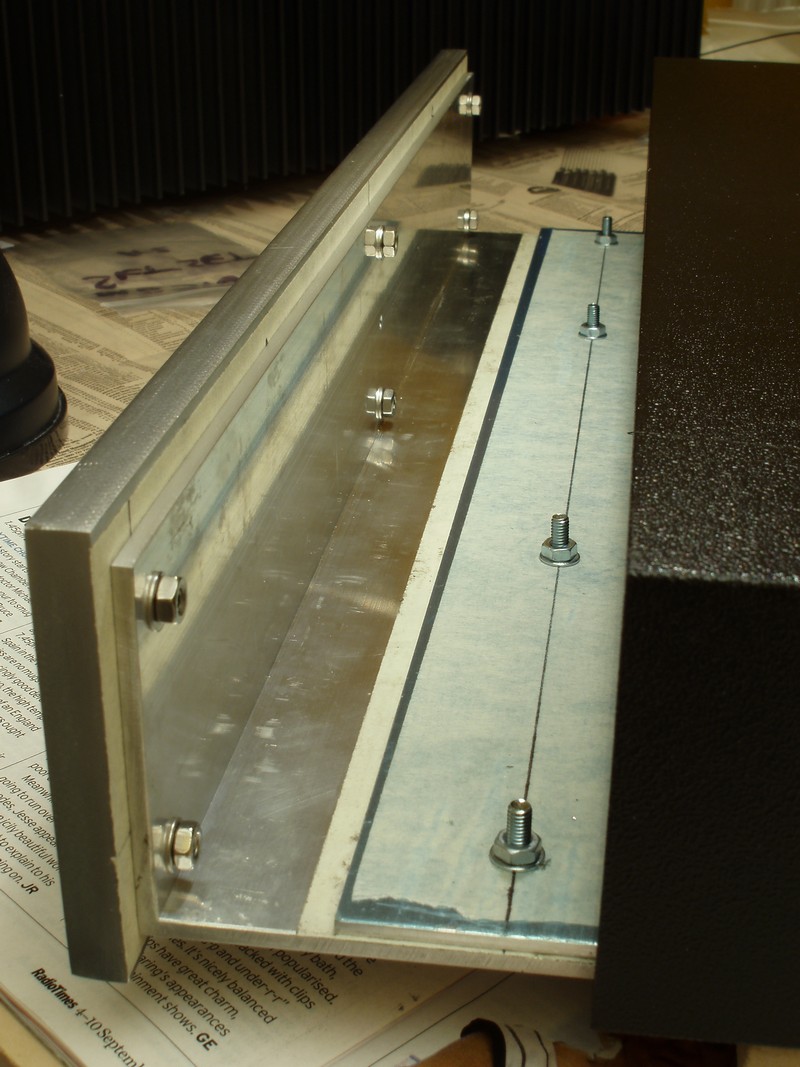
As for the Exposure pre-amp power supply, I used a 'full-width' Naim case sleeve which I had picked-up from ebay many years ago (when they used to go for £30 - £35!). This meant I only had to build the chassis, which as usual is made from two pieces of 3" x 3" x 1/8" aluminium angle joined together by a piece of 3mm aluminium sheet:
The slight flaw here, of course, is that the CDS3 has no internal power supply and is normally powered by the Naim XPS, XPS2 or 555PS. So, all I had to do now was build one...
As for the Exposure pre-amp power supply, I used a 'full-width' Naim case sleeve which I had picked-up from ebay many years ago (when they used to go for £30 - £35!). This meant I only had to build the chassis, which as usual is made from two pieces of 3" x 3" x 1/8" aluminium angle joined together by a piece of 3mm aluminium sheet:
The basic chassis components cut to size - the aluminium angle needed trimming down to fit into the Naim sleeve.
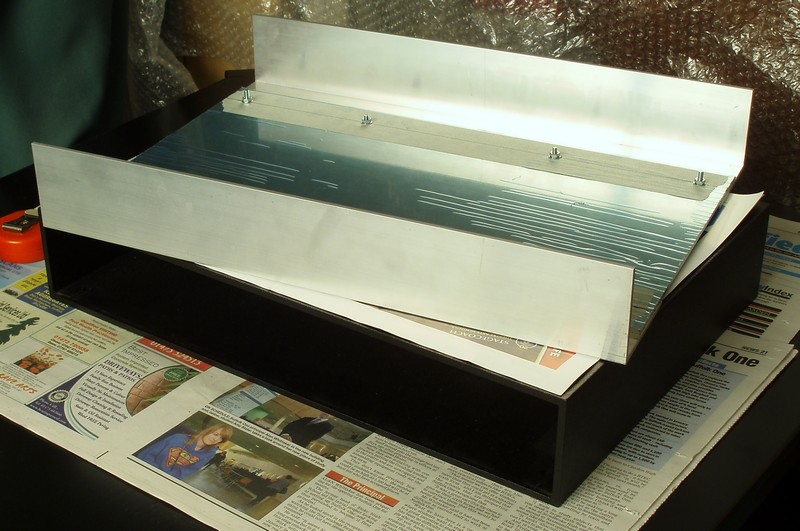
Exactly the same as for the Exposure psu, showing how the front panel is held onto the chassis via six M4 grub-screws. Incidentally, all fasteners in the case are stainless steel.
Bare chassis and front panel test fitted into the Naim 250 sleeve:
Assembled chassis with all holes marked and cut/drilled. Note as per the Exposure power supply the rectangular cut-out for one of LesW's laminated transformers to nestle in:
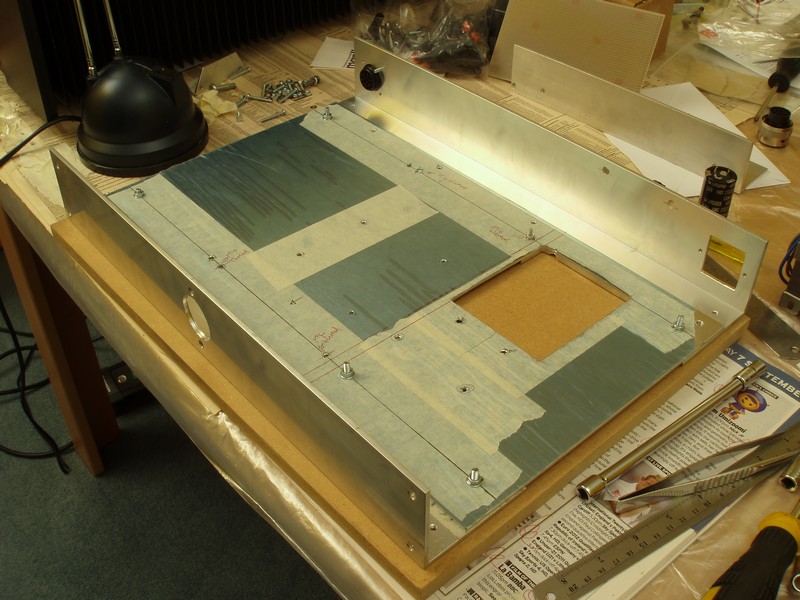
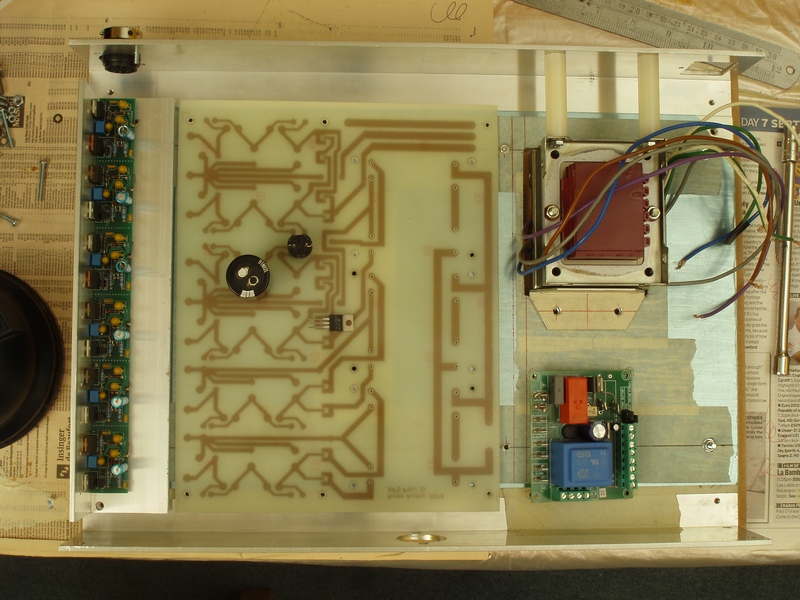
Assembled chassis showing where the main components go. The pcb in the foreground is a Hypex softstart module (this one is actually a dead one used as a dummy, leftover from the build of the Hypex UcD700 power amp). It's probably a little overkill, but given the total amount of capacitance that is going to be used, it should ensure decent long--term reliability. I did initially design my own softstart, combining the flip-flop circuit used in the Exposure psu along with the softstart I designed for the Hypex UcD 700, however, the final cost to build this didn't work out that much less than just buying the Hypex one (especially if you shop around).
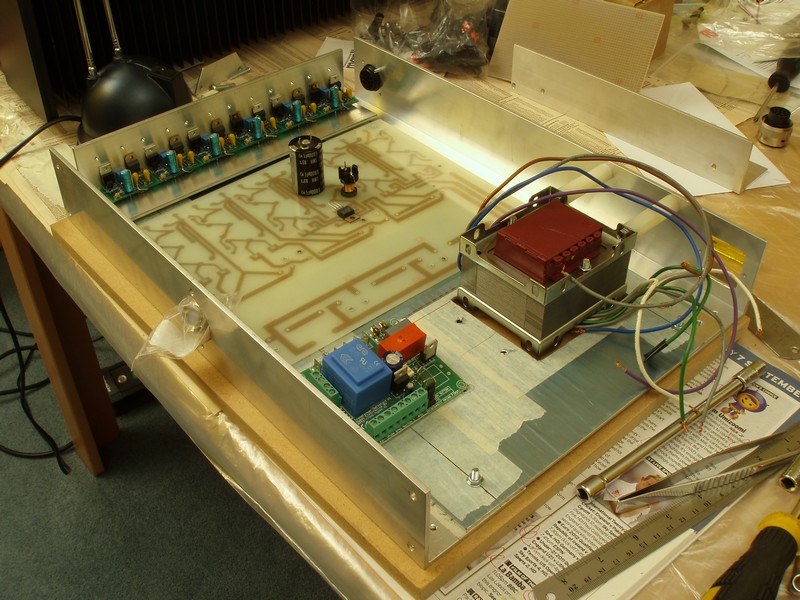
Overhead shot of the chassis. On the left is the assembled regulator board comprising six Teddyregs, on the right one of LesW's special transformers.